Friday, December 30, 2016

Review | Hexiwear

What's up, everyone? SHARD Labs is back after a slight hiatus to bring our latest (former) Kickstarter review... the Hexiwear development system by MikroElektronika. They were gracious enough to send out a review just after the holidays. You can find them (and preorder a Hexiwear for yourself) at the link below:

So without further ado, let's get into the review!


---

Review - The Hexiwear


What is Hexiwear? The box our review unit came in, on the side, describes it as "A wearable development kit for the IoT (Internet of Things) era. A small and sleek, low-powered device packed with sensors to quantify yourself and the world around you."

That describes the device pretty well. Essentially, it's a small handheld puck-like device, made of high-quality plastic and glass, with a small screen and buttons. It can be used as a smartwatch, a smart sensor, or a smart... anything, really. It all depends on what you program it to be.


The Hexiwear development kit comes in a snazzy red-and white box with colorful, minimalistic designs patterned on the outside. Our kit was the "Power User Pack," so it came with two separate sections inside the box; the Hexiwear and accessories, and the docking station. Here's a comprehensive list of everything inside:

-1x Hexiwear (with glass front panel)

-2x Extra front panels (in different colors)

-1x MicroUSB cable

-1x Smartwatch strap

-1x Keychain case

-1x Docking station


There's a lot of fun stuff inside. I'll cover it all in more detail in the upcoming sections. 


The Hardware:


The Hexiwear is a pretty powerful little device. Unlike development boards developed upon the Arduino system, the Hexiwear is based on a microcontroller operating system, meaning multiple apps can be loaded and run on it at the same time. It features a color OLED screen and six capacitative buttons on the outside of the screen that control it. It also comes chock-full of sensors.

Processor: An NXP Kinetis K64 MCU (Running an ARM Cortex-M4, 120MHz processor with 1M Flash and 256K SRAM)

Connectivity: NXP Kinetis KW4x Bluetooth Low Energy & 802.15.4 Wireless MCU

Battery: 190 mAh 2C Li-Po battery

Sensors:
-Accelerometer and Magnetometer
-3-Axis Gyroscope
-Absolute Digital Pressure sensor
-Light-to-digital converter
-Digital humidity and temperature sensor
-Heart-rate sensor

Output:
-1.1" full color OLED display
-Haptic feedback engine
-RGB LED

...That's a lot of specs. And that's just in the Hexiwear itself! If you connect it to the docking station, the expansion slots allow for hundreds of additional sensors, outputs, and configuration. It's somewhat mind-boggling.


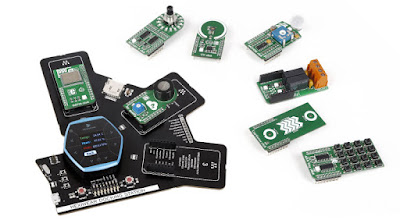
Besides expansion (or, as they call them, "click boards,") the docking station also allows you to enhance the core functionality with an onboard programmer, a microSD slot, and a I2S interface. This allows you to design your own circuits and connect them to the Hexiwear.

What else comes in the box? Why, accessories, of course. There are several fun ways to pimp out your Hexiwear and increase its functionality included in the kit. There are two types of rubber cases- one has straps, for smartwatch functionality, and the other includes a keychain hole (or you can use the hole to attach it to anything else.)


I'm currently using the keychain case for mine right now, and it works very well for keeping the Hexiwear safe and carrying it around.

The other interesting feature is the faceplates. The Hexiwear power user pack comes with three different-colored faceplates: yellow, green and blue. This allows you to personalize your Hexiwear to whichever color you like best. And the capacitative buttons on the faceplate work quite well, and are very responsive.


The Software:


Hexiwear runs on a custom OS designed for the low-power MCU inside. The GUI is very clean and minimalistic, and comes with several apps preloaded. They are:

-Weather

-Motion

-Flashlight

-Fitness

Fitness is actually two apps, Pedometer and Heart rate. Weather measures the air around you and gives you a real-time list of temperature, humidity, and pressure. Motion measures acceleration and rotation along the X, Y, and Z-axis. Flashlight turns on the RGB LED to full white, and fitness does two tasks. Pedometer does just what it says, measuring your step count (while the app is open) Heart rate uses an optical heart-rate sensor on the underside of the device. when you put a finger or wrist up to the sensor, it begins tracking your heart's BPM (beats per minute) in real-time. I found the heart-rate sensor to be a little of balance, as it jumped around quite a bit as it measured my pulse.

The battery lasts a remarkably long time for its small size, thanks to the low-power MCU. The software has a power-saver feature built in, so that whenever the Hexiear isn't in use, it shuts off its screen after several seconds. It can be woken up by double-tappling one of the buttons or by shaking the device.

There's not much to see software-wise with the Hexiwear, out of the box. That's because Hexiwear is first and foremost a development program. The real programs are the one you and all the users design for it.

So how do you program the the Hexiwear? Well, there are two ways of interfacing with the device. For just reading the measurements off the Hexiwear, you can download an app on either the Google Play or iOS app store and connect to the device via bluetooth. This allows you to get real-time stats and update your Hexiwear via OTAP (Over the air programming.) The iOS version of the app (which this was tested on) worked smoothly and without any hiccups, quickly pairing via bluetooth and syncing the readings in real-time.


 Each Hexiwear user also gets access to a private cloud where all the sensor readings are stored, provided by WolkAbout. WolkAbout is an Internet of Things company and partner of MikroElektronika.

For actual app creation, the Kinetis Design Studio (KDS) is a free integrated development enviroment the MCU. Based on open-source software, such as Eclipse, GCC, GDB, and others, the KDS IDE is a simple development tool for designers.

The Hexiwear is also ARM mbed OS 5, as well as mikroC compatible, meaning you can write programs for the Hexiwear in whatever programming language you love best!

---

There's so much to do with Hexiwear, and SHARD Labs will continue to explore and work on developing for the Hexiwear over time. Did we convince you to buy one? If so, head over to the Shop and order your own. Plus, leave a comment saying that you did so! (And what you thought of the review.)


Until next time,


..Carter..

Thursday, August 25, 2016

Review | LameStation

Hey folkey-folks! Carter here. Again. Back from the labs with another review! This time, one of the few DIY consoles you can actually buy on the market. Our verdict: It's pretty sweet. Keep reading for more deets.

As always, a big thanks to the Lamestation folks, who shipped me a review model. They'll be starting a Kickstarter soon for an revised and updated edition of this gadget, so make sure to be on the lookout for that. You can check 'em out here:


---

Review - The LameStation Console


So what is the humorously-named Lamestation? It's a handheld game console, for starters. But it's also so much more. It's powered by an arduino microprocessor, meaning you can program it to run a variety of premade applications (not just games) and even write your own programs!


Now a quick note on this model: This version of the Lamestation is actually scheduled for revision soon. The new model planned will be preassembled (the first one you had to build yourself) smaller and more ergonomic, like other handheld consoles, and will feature a rechargeable battery instead of the older version's AA battery holder. I'll be posting a link to the Kickstarter for the Lamestation upgrade version when it goes live. (Which is hopefuly soon!)


My model came very quickly and was preassembled, which, like I said, isn't how they come for most. But they had a couple premade ones lying around, so that helped make the review easier.

My review package included:

-1x Lamestation Console

-1x Serial-to-USB Cable

-1x DC Power Wall Plug


There isn't a lot, but you don't need a lot to have fun with this thing. The good stuff's all inside the console.


The Hardware:


Lamestation is, at its core, a game console. Running a Parallax Propeller microcontroller, it allows you to program it with an IDE not too different from Arduino. And like an Arduino board, the Lamestation features female headers for the different inputs and outputs of the microcontroller, allowing you to hook up the console to external electronic projects as well.

The Lamestation itself is a rather chunky console. Square, with rounded edges, it fits into the contours of your hands fairly well, but what really makes it bulky is the thickness. The Lamestation is actually a circuit board connected to a clear piece of acryllic on the back by four legs. Protruding from the front of the main board is the LCD screen, and on the back you'll find the battery holder.

It's not so thick that it's uncomfortable to hold, but it does give it a bit more of a hefty weight to it. But if you use the DC power plug, it should help cut down on the weight. And I hate to be negative at all, because it's an amazing system. It's just a little bulky. But I know that's because it's a DIY kit, and most people will need the space to insert and solder the parts together.

I won't speak much on the DIY aspect, since mine came preassembled, but you will need a soldering iron and steady hand to put the console together.


The console has a variety of inputs that include the joystick, A, B, and Reset buttons, volume and screen contrast slider... oh, and the power switch. As for the ports, you have your serial port, DC power, and headphone jack.

The serial port, used for programming the Lamestation, was amusing to see. I hadn't looked at one of those in quite some time, and it seems like an interesting choice for the console. But maybe it's what the chip uses for programming. Anyway, the cable provided with the console for programming is Serial-to-USB, meaning you can plug it right into any ol' computer and it'll work. (Once certain items have been installed. But more on that later.)

The contrast slider is also a nice touch, and definitely helpful. Not every game looks the same under the same contrast level, so it was definitely nice to be able to change that for the best viewing experience.

The last parts you'll see on the board are the LEDs, the speaker, and GPIO headers. The LEDs are fairly simple; one shows code-writing progress and status, and the the other is controllable by the user. The speaker, while slightly tinny, does its job well; although there aren't that many programs yet that have sound included.

The GPIO pins are similar to what you'd find on any single-board microcontroller. You've got spots for 5V and 3.3V power, GND, IO, and more. This makes it possible to write programs that actively monitor, control, and interface with your electronic projects.


The Software:


The Lamestation is programmed via the PropellerIDE, a programming enviroment created just for writing SPIN code, the code that controls the Parallax Propeller chips. This enviroment is very friendly and fairly easy to learn. Even if you don't want to write you own code, the process for uploading prewritten programs to your Lamestation is very simple: Just open the correct .spin file, click compile, and either run- or write- that program to the Lamestation.

The Lamestation SDK that you download from the website contains all the different demos, apps, games, and resources to program your Lamestation. Some of the demos are more complete than others, and some are rather broken. But they're all (for the most part) still in development, so give the Lamestation community time, and they'll keep working on them.

The Lamestation site provides a bunch of documentation on how to program in the Propeller language, SPIN. I dabbled with it slightly, and from what I've seen, it's a very clear and concise syntax to follow. They'll teach you the basics, from lighting up the LEDs to drawing out images on the screen. It's very fun.

There are a whole slew of games that come with the Lamestation SDK. Ranging from Frappy Bird, (what could that possibly be a clone of?) to a maze-crawling game, to Pikemanz (a very broken Pokemon varient) to much more. There's a lot to explore and play around with.

There's also an experimental sound synth app you can run. It's interesting. There's also a few graphics-demoing programs as well.

---
And that about wraps up my review. Did I convince you guys to pick up the console? Or wait for the revised model and nab that instead? If you simply can't wait, head to the >store< to pick up a Gen 1 Lamestation. Or bookmark this article for when the Gen 2 model is released!

Write for you later,

..Carter.. 


Wednesday, August 10, 2016

Review | Circuit Scribe

It's me again. Carter here. Back with another SL testing of a crazy way for you to draw electronic circuits... with a ballpoint pen. I know, you're shocked.


...You are shocked, right? Anyway keep reading and I'll give you the low-down on this fabulous product that raised nearly $700,000 on Kickstarter.

Also, a big thank-you to the folks at Electroninks Inc.! (I know, it's like a tougue-twister.) You can find them and their products at their website:


---

Review - The Circuit Scribe System


What is Circuit Scribe? To put it shortly, it's a rollerball pen that writes with conductive silver ink. Limited editon 24K gold ink (not) coming soon. But it makes drawing circuits as easy a laying down a line on a piece of paper.


The Electroninks team was very generous and on the ball with sending me my review unit, it arrived just a couple days after I contacted them. So kudos to them for their speed. My review package consited of the Circuit Scribe Ultimate Kit, which includes, among other goodies,

-Workbook/Sketchbook

-Steel Sheet

-Resistors


...A bunch of modules, including:

-Dual-colored LEDs

-9V battery adapter (with included 9V battery)

-Motor

-Switches

-Jumper wires

...And more. The jumper cables let your circuit sketches become Arduino compatible, which is really cool. It makes the learning curve for basic Arduino skills far less of a challenge, without any messy breadboards to build. If you can draw it, you can power it.

But there are so many amazing elements to the kit! You can really do a lot with Circuit Scribe, depending on which kit you buy. And even if you don't use the snap-and-play modules, the conductive pen by itself has a lot of uses with standard electronic elements.


The Hardware:


When it comes to conductive inks, Circuit Scribe really sweeps away the competition. As shown in their Kickstarter video, they've really perfected the formula for a non-toxic, water-based, conductive silver ink that dries nearly instantly. This allow for the creation of circuits that connect every time and can be set up in moments.

The workbook contains a plethora of mini-lessons on how to use your pen and how the components work. Outlines on the paper let you know where to place the correct connections, but again, don't feel restricted to those lines. The beauty to Circuit Scribe is that you can put the ink anywhere and, as long as you put down a solid line and don't cross connections, it will still light up. Or beep. Or do whatever you can think of! (Except, perhaps, make you a sandwich. I'll suggest that to them for a future module.)

The steel sheet included in the kit is what allows you to hold the modules to the paper. Simply place it behind a workbook page (Or any piece of paper) and your modules will snap onto the paper with a nice, solid click. Also, the back of the sheet has a nice diagram on how each component functions.

When you've finished setting up your circuit, you can power it all using the 9V battery and snap adapter included the kit. This is an especially nice touch by the Circuit Scribe folks; not too many companies package batteries with their kits. So it was nice to find a power source included.


I've mentioned so much, and yet I feel like I've only scratched the surface of the Circuit Scribe system. Follow that link at the beginning to discover their site and all the various products they offer in this kit and beyond!


The Software:

Not much to say here. Obviously, there's no real software for this hardware-centric product, but if you intend to use this with Arduino, (Which if you have it, I recommend) you'll need the Arduino IDE. 

Oh, and the Autodesk 123D Circuits software, which lets you create virtual circuitry, works with Circuit Scribe, meaning you can set up a full circuit on your screen and make sure it works before you lay down a sing drop of ink.


---

Did I convince you to grab this fantastic kit for yourself? If I did let me know in the comments below and then head on over to their Store and, as always, tell 'em Carter sent you. 

Catch you later, skaters!...


..Carter.. 

Review | The Makey Makey GO

What's up, everybody? Carter here with another review form the labs... this time, a neato little system that converts your touch into a digital controller, regardless of the object. (Mostly.) It was highly successful on Kickstarter, raising almost $200,000. Intrigued? The review starts below.

Many thanks to the wonderful folks out of Joylabz who shipped me the device! A big thanks to them. You can find them at their website:


---

Review - The Makey Makey GO


What is Makey Makey? And more specifically, the Makey Makey GO? To quote the Kickstarter, it's an invention kit on your keychain. And they don't lie; this stuff is pretty fantastic. Using alligator clips that hook the device up to any object that conducts electricity, it digitizes your touch and sends the signal back to your computer as either a mouse or spacebar click. Perfect for one-button games, menial tasks that you want to make more fun, or, you know, bongo-drum jello.


The folks at Joylabz were very nice to ship me a review unit, and incredibly fast to do so as well. My kit came in just a couple days and included:
-1x Makey Makey GO Device
-1x Instruction Manual
-1x Booster Kit

The device itself comes with the plug-and-play dongle, as well as an alligator clip for hooking it up. The booster kit, which they graciously included as well, includes a bunch of conductive tape, cloth, wires, and jumper cables to help you set up an epic project with your device.

The Hardware:


The Makey Makey GO may be small, but it's a cool device. Roughly the same size as your standard USB flash drive, it fits into your pocket easily. But why would you put it in your pocket when you can flaunt it to the world!?! You can easily put it on a keychain or a cord and wear it around your neck.

The device is simple enough to operate: There are three capacitative buttons running along one side of the device. Well, two are buttons; one has a divot in it for you to clamp the alligator clip on.

The other two buttons control the reset, type of button press, and sensitivity mode. Reset allows you to, well, reset the device should you attach a new object. Button type lets you cycle between being detected as a mouse press or spacebar press. And sensitivity lets you increase the touch level dramatically. On very conductive surfaces, you can even have it detect your presence when your hand isn't even touching the object! (It still has to be close.)

The alligator clips have firm grips and are easy to use. They have a soft plastic casing on the outside to help grip the clamp and lessen a freak-out from the system's touch detection.
The setup for a computer is super easy. Just plug it in and you're good to go! The computer recognizes it similar to how it would a mouse or keyboard. Plus, the rainbow LEDs on the device light up in a cool light show when you plug it in.

The Booster Kit is an expansion pack for your Go. Think DLC for the real world. You get a BUNCH of nice, conductive materials that you can hook up to your Makey Makey GO and have it do tricks. Like laying down conductive tape on a slackline, hooking it up to a tablet, and seeing how long you last. It's a ton of fun.


The Software:


This area's a bit trickier to cover, since the Makey Makey Go works to varying degrees with a TON of software. If the program accepts mouse or spacebar input (Which, if it doesn't accept either, is odd.) the GO will work. The Makey Makey site has a ton of demo Scratch applications that you can use right in your browser to test out how the GO works. (I was even able to download some of the Scratch apps straight to my computer and run them offline with the Scratch Offline Editor.

I've found that the GO device generally has more application as a spacebar input than a mouse clicker. Because while it will input left-clicks, you can't use it to move the mouse around the screen. But if you want to use a big red button of doom to make those Amazon One-Click Purchases, be my guest.

Also, nearly every website out there with Flash games has some endless runners that'll work quite well. The Flappy Bird Scratch demo I tried, however, was incredibly hard. I barely made it past one pipe! But maybe I'm just not hipster enough to play that game.

But there a definitely a lot of applications for this device. And with its portability, you can take it nearly anywhere that you, a laptop, tablet, or smartphone (with adapter) can go.

---

And that's that, in a nutshell! If you want to learn more, or find out when and where you can buy one of these bad boys for yourself, head on over to the Store Page and tell 'em Carter sent you. 

Until I write again...


..Carter..

Thursday, July 28, 2016

Project: Preview | LumoPad

Today I've got a quick- but fun- review for y'all: the LumoPad light drawing system by Nestor Tkachenko out of New York. You can find them at their Kickstarter:


Stick around and I'll give you the inside scoop.


---

Review - The LumoPad


What is LumoPad? It's simply a phosphorescent-paint board. You draw across the surface using a mini LED, which leaves streaks of light that fade after a short period of time. It's awesome. It's the perfect tool for children in a dark room, flipart-style animation,


The kit I recieved is just a prototype and and isn't as polished as the finished model will be. My version included:

-2x LumoPads

-1x superbright LED


It's simple, but effective and fun.

The Hardware:


The LumoPad is simple enough in design; It's a simple piece of foam board that's been painted on one side with phosphorescent (or Europium-based) paints. When exposed to the superbright LED, the chemical reaction leaves a trail of glowing light on the board. The finialized model will have the board enclosed inside a frame, for protection against wear and tear, but will still weight very little.

My LumoPads came in two different colors: Yellow and Blue. The yellow board was made with phosphorescent paints, which are brighter, but fade quicker. The blue is a Europium-derived paint that isn't as bright, but holds a glow longer.

The LumoPad is still in design progress and the creators have announced that they'll be continuing to upgrade and enhance the design over time. It's a fun product that's mess-free and great for children (or adults) to enjoy in a darker room, in bed, or just with a blanket over their head. 


And wraps things up! If you want to learn more, or find out when and where you pick one of these boards up for yourself, head on over to Kickstarter and tell 'em Carter sent you.
Until the next review...
..Carter..


Monday, July 11, 2016

Review | The TinyArcade

Today I've got a really amazing review for all you folks: the  arcade machine that fits in the palm of your hand, TinyArcade! It's made by the awesome folks at TinyCircuits up in Akron, OH. (Not too far from SHARD Labs, actually.) They were generous enough to ship a review unit down to me. So many thanks to them. You can find them at their website:


Intrigued? Keep on scrolling and I'll give the low-down on this Snickers-sized game box.

---

Review - The TinyArcade


What is TinyArcade? Put simply, it's a miniaturized arcade machine. You have a screen, joystick, and two buttons, all positioned in the standard setup inside a cabinet... the size of a fun-sized candy bar. Seriously. It's awesome. And you can get the cabinet in several different form factors: laser-cut acrylic, wood, or even 3D printed! The first two options can be ordered as either preassembled or build-it-yourself. The 3D printed, of course, comes in one piece.

The kit also comes with several bonus items as well. Besides the slip with the link to video instructions on using the TinyArcade, my model also came with:

-1x Decal stickers

-1x 8GB MicroSD card (and adapter)


Those decal stickers are nice. They allow you to pimp up your Arcade with a retro-style design on all sides. My sticker style was spaceship-themed, a nod back to the old Space Invaders game. 

The Hardware:


The TinyArcade is another stunning piece of technology by a company that specializes in scaled-down electronics. And yet the cabinet itself is suprisingly simple. There's a screen (duh!), power switch, joystick and two buttons, speaker and volume slider, and MicroSD slot. Oh, and the MicroUSB power port. Which is the only complaint of mine, and one I'll tackle right off the start.

The USB port is positioned inside the cabinet, beneath the screen. To access it, you have to thread a cable up through the bottom of the cabinet while still exerting enough force to plug it in. This is tricky enough. But for me, the ribbon cable that connected the main board to the speaker curled up and in front of the USB port, making inserting it impossible. I eventually used a Lego brick seperator to push down the ribbon and insert the cable. And not every unit may have this problem; it depends on the build. So that's just a personal complaint about my specific model.

Another note for users: The MicroSD slot is NOT CAPTIVE! It's simply static-holding. So if you push in your MicroSD card as hard as you can for five minutes, you aren't going to hear a click; just the snap of your card breaking.

The TinyArcade runs on a powerful 32-bit ARM processor, the same as in the Arduino Zero. This allows you to drive 30 FPS videos with audio, and play arcade-level games. The Lithium battery allows you to run the Arcade for roughly 3 hours of gameplay. And that speaker is real and magnet-driven, not just a piezo buzzer.

The display is a 96x64 OLED screen with 16-bit color depth. As I said before you can run any video at 30 FPS, which makes for a smooth (albeit cramped) viewing experience. And the backlight is software-controlled, meaning you can program adjustments for brightness control.

The last thing I'd like to mention is the audio. The TinyArcade comes with a magnet-driven speaker that can pump it out. Of course, the louder you get, the more crackly the audio will become, and you will drain the battery a bit faster. Also, not every game has audio. Just Tiny Shooter, Tinytris, and the Video Player, as of this writing.

The Software:


TinyArcade run on Arduino, a wonderful, versatile programming system that is simple to program yet quite powerful. The TinyArcade enlists a bootloader program that reads your MicroSD card and allows you to select a program installed on the card. It then loads the program to memory, and starts up the application. One note: if you remove the MicroSD card for any reason and turn on the TinyArcade, the only option you can select is the last program you loaded up.

TinyArcade comes with a handful of programs already installed on the MicroSD card. They are:

3D Demo: A Doom-style maze with nothing but a laser gun and TinyCiruit logos.

Driver Demo: A nod to the classic game Outrun.

Tiny Asteroids: An Asteroids clone.

Flappy Birdz: A flappy bird clone.

Tiny Invaders: A Space Invaders clone.

Tiny Run: An endless runner.

Tiny Shooter: A 2D space side-scrolling shooter.

Tinytris: A Tetris clone.

Video Player: Plays video files on the MicroSD card.

My favorite game, Tiny Run, is also the hardest. But they're all fun. None of the games have that much depth, but then again, this is an arduino-powered arcade machine, not a Playstation. The creators have said, however, that more games will be developed for the system in the future.

The only non-game application on the TinyArcade is the Video Player, which is a really neat program. It allows you to play videos that you have uploaded to the card on a tiny screen. So don't expect 4K graphics here, people. The TinyArcade comes with two videos preloaded: The original Kickstarter video, and Big Buck Bunny, an open-source short film made with Blender.

And you can always create your own content for your Arcade! That's the beauty of Arduino- through the USB port, you can easily reprogram the TinyCircuitry to do whatever you can come up with! (Within the TinyArcade parameters, of course.)

---

And wraps things up! If you want to learn more, or find out when and where you can buy one of these bad boys for yourself, head on over to the TinyArcade preorder page and tell 'em Carter sent you.

Until the next review...


..Carter..

Wednesday, June 15, 2016

Project: Preview | RoutaBoard

What's up, everyone? Today I'm reviewing the Routaboard, a new prototyping circuit board by KnivD out of London. Many thanks for the review units he shipped over. You can check him and his Kickstarter out here:


---


Project Preview: Routaboard


What is Routaboard? It's a really cool device- a blank circuit board with unconnected traces between each of the holes. This means that instead of having to connect your electronic projects together with wires, you can simply add a tiny drop of solder in between the holes you want, thus creating an actually professional-looking prototyping package.

Routaboard also comes with free software called RoutaEdit. It's a simple program that let's you design your projects digitally and figure out where to solder the traces ahead of time.
My review unit came speedily on through, which was nice since it came from overseas. I recieved four boards, (Two standard-sized doubled-sided boards, and two standard-sized singled sided boards.)

The boards look very sleek and professional, with a black finish contrasted by the gold holes and traces. They came without a single scratch or chip, which is very nice.

The Hardware:

The boards are a unique, and yet very smart idea and design. The standard size is 24x32 holes, big enough for most Arduino-type projects. (Or an Arduino shield!)


The traces are a bit confusing at first glance, but open up the RoutaEdit software and they'll make sense. The traces extend in all four directions from each hole, but are seperated from each other by gaps in the metal. The idea behind Routaboard is that you can apply a drop of solder in the gaps in the traces, which eliminates the need for wires in your package. And because there's no need to cut wires, you can use a desoldering tool to remove these solder drops and reuse the boards again and again.

Running along the side of each board is a strip of metal. These connect to the grid of holes and work as the power, ground, and a strip for inputs. (Such as Arduino analog or digital.)
Overall, the system is very handy. It makes prototyping much more minimal and space-conserving, although soldering the traces together may take a little more time. Keep in mind that to use this product to its maximum, you need a soldering iron and at least (some) solder on hand. Although if you're buying this board to begin with, you won't go far without said items.

The Software:

The Routaboard software, RoutaEdit, is... simplistic. I haven't used it for that long, but from what I can tell there... isn't much to do.


That's not to say it isn't helpful; RoutaEdit does give you a visual representation of how the traces work on the Routaboard, and you can use it as a guide while soldering to make sure you solder the correct traces.

The software also lets you add a virtual component to the board; however, the only components available right now are "blank" 1x2 components, DIP8, 14, and 16 parts, and resistors. Nothing else exists... yet.

The software is still in its early stages. As Routaboard continues its campaign and development, more features will be added, including a processing code written specifically for RoutaEdit projects. I can't wait to see what becomes of the program.

Oh, and a quick note: As of this post, RoutaEdit is only available for Windows. So OSX (sorry) macOS users, you may have to wait a bit.


Well, that about sums up the product. Did I convince you to invest in Routaboard? If I did, let me know in the comments below. Or send me your wallet out of gratitude. Either works. And ff you want to spend even more money, consider donating to the SHARD Labs GoFundMe!

-GoFundMe

Later, skaters!

..Carter..

Wednesday, May 11, 2016

Check out the DragonBox Pyra!

Hey guys. Today I've got another cool (and this time, open-source) product, the DragonBox Pyra! (pyra-handheld.com)


It's a portable Linux computer LOADED with special features, all in a clamshell package roughly the size of a DS.

Here's DragonBox's Press Release:.

---


The DragonBox Pyra – a combination of a miniature PC and a video gaming console. Developed together with a large community.
OpenSource, no spy-software included, no registriation necessary. Nothing.
Even the schematics will be made public.
A full-featured Desktop-Linux-PC that fits your pocket, open for everything and everyone. Designed and produced in Europe, avoiding slave labour.
Pre-orders have been coming in since they were made available the 1st of May.
Similar to crowdfunding in nature, but only a downpayment is needed –  and the remainder due when the unit is ready to be shipped.
The minimum order quantity of 500 devices has been funded already.
Next milestone is at 750, which means 1000 can be produced.
To get to this point has taken three years of development.
In February functional prototypes were made, which are thoroughly being tested to make everything ready for mass production and subsequent hands-on within the year.

As a successor to the Open Pandora, the Pyra carries numerous large and small improvements.


Besides updating the specifications to more modern standards, it follows a new concept that no other mobile device to date offers:

The Pyra is small and compact (only 13.9x8.7x3.2 cm), yet extremely modular. Designed to be modular it is user upgradable, both mainboard, displayboard and the one that has the processor and RAM are individual boards.
Designed to be easily repaired or modified - one screwdriver is all you need to take it apart.
Better for everyone and the environment.

Multiple real USB ports, Game-controls, backlit keyboard, replaceable battery, SD-card slots, Wi-Fi and Bluetooth, optional LTE mobile internet and telephony services with GPS and various sensors.

Use it as a desktop PC by connecting a HDMI-cable to a monitor.

The Pyra uses an ARM processor and comes equipped with a Debian GNU/Linux operating system. No accounts or registration is necessary to make this device fully functional, and no ads to be found accompanying the apps.

The Pyra has a large fan base and a community around it that goes far back.
A similar device is not currently available on the market.
---


Quite a mind boggler, eh? It's pretty sweet. 

You can preorder one of these bad boys at the same link at the top of the article, or go 
directly to their preorder page HERE.

Enjoy! We'll continue to cover this amazing product as it continues to be developed.

Until next time,

..Carter..


Wednesday, April 6, 2016

Project: Preview | WeKast Presentation Stick

Hey Folks! Another Project: Preview for you all! Today I'm previewing the WeKast presentation system by the WeKast team out of Tel Aviv. Many, many thanks to those folks for getting me a review unit. You can check them out at the links below:


---


Project Preview: WeKast Stick


So what is WeKast? To quote the Kickstarter, it's the only mobile-based professional presentation solution that completely eliminates the awkward set-up process while increasing mobility and engagement.

...To much for ya, huh? Well, it's essentially a wireless dongle that allows you to display your slideshow, powerpoint, demonstration, etc... directly from your smart device. No cables, laptops, or even WiFi necessary. It's pretty handy for those business meeting presentations where the WiFi just happened to go out- and guess who forgot their HDMI cord?

I got a review unit extremely fast; they informed me that they had shipped the unit on March 22nd, and I recieved the unit just three days later, on the 25th. So kudos to them in the shipping department.

My review unit camed enveloped in a soft velvet bag, secured with drawstrings. Each individual part of the kit had a plastic sleeve protecting it, and the WeKast Stick itself was secured in bubble wrap. So there was no chance of the good ol' USPS busting up this shipment.


I was surprised (in a good way) at how many accessories the review unit came with. Keep in mind, however, that many of these parts will be integrated into the final product and won't actually be included as seperate attachments. But anyway, here's what I got:

-1x WeKast Stick

-1x 6000 mAh Portable Battery

-1x Female/Female HDMI Connector

-1x Female HDMI/Female VGA Adapter

-1x Micro USB Cable

-WeKast and Battery Instruction Manual

A bunch of goodies included. Again, most of this will be integrated into the final product, so you won't need to attach all the external gadgetry. But this is a review unit, so the design and asthetics are NOT final.

The Hardware:


The WeKast is a smooth-looking little stick. Wrapped in matte black plastic, it is sparse of any decoration save the sticker on either side with the WeKast logo. (Actually, there's a enterprise option on the Kickstarter to order WeKasts with your own logo.) The HDMI plug is covered by a plastic cap made of the same material.

To set up my stick, I plugged the WeKast into my TV using the provided HDMI adapter. I then plugged the power pack into the stick via the back microUSB port. As soon as the power is plugged in, the stick automatically boots on.

To me, the WeKast is a pretty well-built product. The casing doesn't feel too flimsy (although I haven't, nor would I recommend, putting a lot of pressure on it.) The need for an external battery limits its potability slightly, but again, this just a TEST model. The stick is powered by a quad-core processor, meaning that your presentation will always be snappy and quick to load.

The Software:


The WeKast software is fairly simple and easy to use. It's built upon Android 4.4, and you'll actually notice this when the Android logo appears momentarily during setup.


In order to use the WeKast, you need three pieces of software to make things happen: First, you'll need a PowerPoint Presentation creation app. (Pretty obvious that you would have one if you're purchasing this device.) Secondly, you need the WeKast add-on button for PowerPoint. This installs into the PowerPoint app, and allows you to convert and send your slides and presentation files to your phone through your phone number. I found this method of file transfer a little odd, but just think of it as texting yourself the files. Finally, you'll need the WeKast app.

The WeKast app is SUPER simple. When you first enter the app, if you don't have any files, there's literally nothing to do or click, beside refreshing the page. (Although I do love the loading screen for the app, with its little flaming-logo animation.)

Once you have some files inside the app, you're ready to hook up to the WeKast stick itself. On Android and Windows Phone, this process automatically happens. On iOS, (I was) it may or may not automatically connect. If it doesn't, you have to go into the Internet Connections setting of your phone and connect to the "WeKast" network.

And now you're ready to rumble! You can load a presentation, set it to auto-scroll through the slides, and even add notes to each slide. It's pretty amazing.

Overall, the WeKast system is an incredibly helpful tool for any business who wants an easy, fluid way to present their information. As the Kickstarter continues and hopefully suceeds, it'll be interesting to see how the WeKast evolves and is formed into an even better product.


And that's the show! Be sure to check out the Kickstarter and donate to that. If you want to spend even more money, consider donating to the SHARD Labs GoFundMe!

-GoFundMe

Otherwise, have a great rest of your April!

..Carter..

Wednesday, March 23, 2016

Don't forget the forums!

Hey guys!

Just a heads-up that there are forums for the SHARD website!

Either use the following link or click the SHARD Forums tab on the top bar.

Thanks! Can't wait to see ya there!

..Carter..

A Change in Social Media Plans...

Hey everybody. I know it's been a little while since the site had any activity, but I just wanted to update everyone on SL's social media presence.

For the entirety of the site's existence, SL has had a large presence on Google+, and that has been mainly it. (Much to the chagrin of some.)

Up until February, we also enlisted Google Friend Connect, a service that allowed people with Twitter, AOL, and various other services to follow the site as well. However, Friend Connect... no longer exists. Well, it does, per say, but it only allows you to connect with Google+... which you can already do through the embedded Google+ tab on the blog.

So here's the role call for SHARD Labs: If you previously used Friend Connect to follow the site, PLEASE switch over and click "Follow" on the Google+ tab.


If you don't have a Google+ account or haven't bothered to follow us in the past... well, do it or suffer the consequences. Just kidding. Maybe.

Ta ta!

..Carter..

Tuesday, March 1, 2016

Review | The Qoo Bracelet

Today's review is the Qoo Bracelet, a nifty transparent form of media sharing brought to you by AC Grindl, the founder of the Colombian-based company. Many many thanks to him for dealing with the import hassles of getting the bracelet to me. 

Check out his website where you can buy one of your own!


Review: Qoo Bracelet


What is the Qoo Bracelet? Simply put, it's "social media you can wear." It's an NFC-equipped, smartphone-connecting wrist band that seamlessly, privately, and instantly lets you share your favorite links, pictures, videos and other forms of social media with anyone else.

Just by holding up your wrist.


HARDWARE:

The Qoo Bracelet is a simple, minamalistic band of rubber with a larger disc of rubber in the middle. This disc contains the pre-programmed NFC chip that will enable you to share with phones.

The band is a smooth white rubber. It feels nice and doesn't pull at your arm hairs as it slides around. There's no connector at the bottom; instead, strips of metal run through the band. These lock into place outward, and then snap into a loop when bent. This makes for a one-size-fits-all fit, which is nice, considering that people's arm vary so greatly in size.

There's not much else to say; the company's Qoo logo is embossed on the top of the circle in pink (or gray, the color I recieved.)

SOFTWARE:


The software that you'll use to upload your media is conveniently powered by Wordpress. In fact, the custom site that the band redirects to is essentially a modified blog. This makes it very easy to upload your pictures and whatnot without worrying about rewriting NFC tags and whatnot.

To begin, you'll need the instructions that came with your Qoo bracelet. These instructions provide the unique alphanumeric code that you'll need to enter into your site in order for your band to direct phones to the site. The Qoo website does contain several video instructions that'll be very helpful during this process.

WARNING: YOU MUST FOLLOW THE INSTRUCTIONS TO THE LETTER. Missing or messing up a step can cause your band to redirect to nothingness instead of the personall media wall. And we don't want that now, do we?

Once you own your custom mini-blog, you'll be able to customize to your heart's content. There are more tutorial videos on how to do this as well. Wordpress has a handy system that categorizes your videos, pictures, links, posts into seperate categories through the help of a static homepage.

This brings me to a small complaint: the upload size. Wordpress has an 8MB file size upload limit, which works fine for most media, but not videos. If you want to upload a video that's larger than that, you're gonna have to provide a link to a YouTube video or file storage site instead.

But the system is very nice overall. There's a plethora of different languages to choose from, so you don't have to worry about what language you speak in order to use the band. The site customizer lets you change the themes, colors, and much more.

Overall, the band is a pretty handy tool that greatly simplifies the media sharing process.

Once again, thanks to AC and if you want to check out (and possibly purchase?) the Qoo Bracelet, head over to the Qoo Shop and pick one up for $6.99.


Keep checking back for more reviews coming soon, and consider supporting the GoFundMe if you like what you see! Until next time,

..Carter..

Monday, February 22, 2016

Project: Preview | RezaNinja Laser Tag

Today's review is a bit of a departure from protocol; I'm actually previewing... a laser tag system? The folks at RezaNinja were nice enough to ship me a review set across the sea (and remarkably quick, at that). 

Many thanks to those guys, who you can check out at the links below:


---

Project Preview: RezaNinja Laser Tag

What is RezaNinja? The company's slogan is "Reza mean laser!" I'll take their word for it. But on a more serious note, this business specializes in cosplay, gaming, and laser tag. The lattermost of which I am reviewing today.

They shipped me a review set remarkably fast; it took less than a week for the shipment to make it overseas from Hong Kong to my house. So kudos to them there.

If you managed to see them at the New York Toy Fair this year, than you probably don't even need to read this review. But since you probably didn't, (I sure wasn't going) keep reading after the break!


The RezaNinja laser tag system is a pretty nice-looking set of gear. And boy, is there a lot of it.


My set included:

-2x Laser Gun/Swords

-2x Point Meter Belts

-2x Foam Shields

-2x Foam Daggers

-2x Foam Throwing Stars

-2x Sword Sheaths

-2x Arm Bands

...That's a lot of stuff. But it's all very nice. The foam accessories don't really do much for the actual game, unless you buy the impact vest which measures physical hits as well. But it's all great for cosplay!

The Hardware:

Let's get into the meat and potatoes of our pie now, however: the RezaSword and Vest. This is what you'll be using to actually play the laser tag game.

THE SWORD/GUN:

The RezaSword is a pretty nice looking piece of equipment. Some Kickstarters I review send products that are still in their prototype stages, and therefore, not as nice or streamlined, but RezaNinja has been working on their system for a while now.


It reminds me a bit of a Wii remote. The device is slightly curved, with a trigger on one side, and fits well enough in your hand to work in either sword or gun mode.
The handgrip is covered by a matte black rubber cover, also a la Wiimote. This covers the battery cover as well as the mode-changing button at one end.

On the front, you'll see a large angled piece of rubber with a hole in the middle. This is the laser part. (This is starting to sound wierd.)

The their are six LEDs on the gun, three on each side, and these blink repeatedly at you as play the game. There's also a rumble motor inside that vibrates whenever you're "hit."
This is all very nice, but it brings me to my first complaint: the sound.

When you first insert the AAA batteries into the remote (WARNING: You're gonna need 12 of these puppies to power the entire set) and hit the switch, the sound system kicks on with some jammin' rock tunes. Nice! Aim and pull the trigger, and you'll here the semi-loud "Pew!" "Pew!" as it fires on the opponent. But switch into sword mode, and you'll be greeted with the EAR-SPLITTING sound of metallic sword blades smashing into each other. And we're talking deafening here. It may be a little better outside, (I haven't tested it outdoors) but then again, your neighbors might just call the cops.

Otherwise, the RezaSword is very nice! For all of its sounds and blinkeys, the pair managed their battery life quite nicely. You'll want some rechargeable batteries for them to help ease your wallet.

THE BELT:

What fun is a laser tag game without a point system? That's what the belt accomplishes with a (somewhat) easy way of keeping track of points.

The belt isn't as nice as the gun, but still accomplished its job pretty well. It has one triangular sensor on the shoulder-region of the fabric, and a point-counter screen on the back strap. This counter goes up with each hit you receive; as opposed to most systems where it shows your points for how much damage you given.

This is where the electronics to the system get a little screwy: To "sync" the belt to your sword, you must point the gun at the belt's sensor and toggle a little plastic switch on the sensor back and forth. This (may) work, at which point the belts' embedded LEDs switch from solid blue to a pulsing green. If it fails, the screen reads: ERROR and explodes.

Okay, so it doesn't explode. But hooking the different peripherals can be quite a pain, especially if you don't have someone else helping.

Overall, the system is pretty fun. You'll want a pretty large area to play in with (preferably) some obsticals to hide behind, but it can be fun in a smaller area, too.

RezaNinja has also announced that they're working on an augumented-reality add-on to the system as well, which will allow users to "unleash secret powers" and fire digital dragons and other things at each other with the help of AR headsets. All this and more they're working on and hope to fund in their Kickstarter. Check it out below!

Well, that's all for this week. Be sure to check out the SHARD Labs GoFundMe...

-GoFundMe

...and if you like what you've read, consider donating a buck or two. (Or five hundred, if you're Bill Gates. I know you're reading this, man.)

Otherwise, keep your eyes peeled for the next review. Have a great week!


..Carter..